
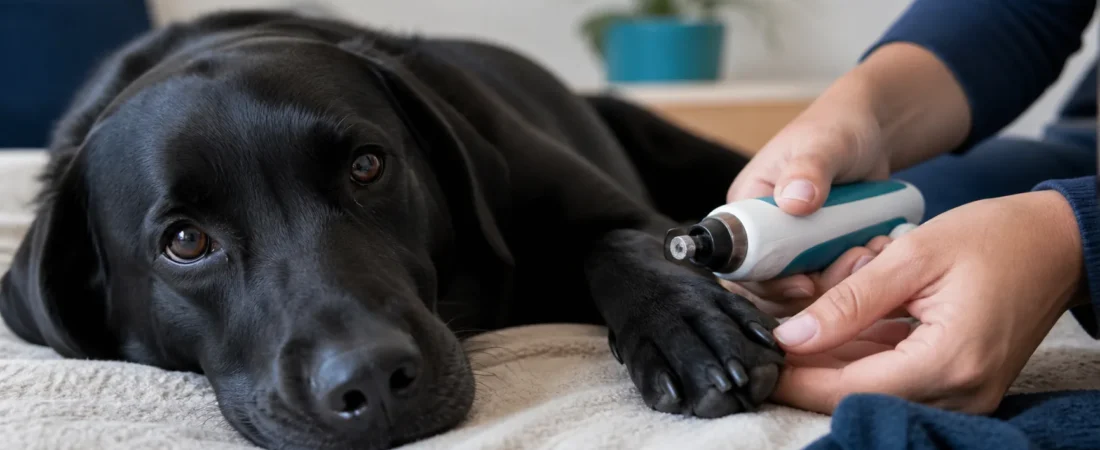
Quick answer: To trim black dog nails safely, remove only a very thin slice at a time and inspect the freshly cut surface after every clip. Stop when the center begins to look darker, smoother or slightly shiny. Keep styptic powder within reach, reward calm behavior and never force a frightened dog to finish all four paws in one session.
Black nails can feel intimidating because the pink quick—the blood vessel and nerve inside the nail—is not visible from the outside. The solution is not a single brave cut. It is a slow, repeatable process: good lighting, sharp tools, tiny slices and permission to stop early. Once you know what to look for, nail care becomes much less like guessing.
Why black dog nails need a different approach
On a clear nail, you can usually see where the pink quick ends. On a black nail, you must read the cut surface as you shorten the nail. The dry outer material looks pale, chalky or flaky. As you move closer to living tissue, the center becomes more defined and may look dark, smooth or glossy. That change is your signal to stop.
Long nails also deserve patience. The quick grows farther down an overgrown nail, so one dramatic trim cannot safely restore a short length. Regular small trims can gradually encourage the quick to recede. If nails are curling toward the paw pad, split, painful or severely overgrown, ask a veterinarian or experienced groomer to handle the first trim.
What you need before you start
- Sharp scissor- or plier-style dog nail clippers sized for your dog
- A pet nail grinder if your dog prefers gradual filing
- Styptic powder for minor bleeding
- A non-slip mat and bright, direct lighting
- Small, high-value treats that are easy to deliver quickly
- A calm place and no expectation that every nail must be finished
Check the clippers before they touch a nail. Dull blades can crush or pinch instead of making a clean cut. If you are new to the tool, practice trimming dry pasta or a drinking straw so you can learn the pressure and angle without involving your dog.
Step 1: Build comfort with paw handling
Do not begin by grabbing a paw and producing the clippers. Start with a few seconds of gentle handling. Touch the shoulder, slide your hand down the leg, briefly support the paw, reward and release. When that feels ordinary, hold one toe for a second. In a later session, bring the clipper near the paw without cutting.
Watch the whole dog, not just the foot. Turning away, lip licking, freezing, pulling the paw back, panting, trembling, growling or refusing treats can all mean the session is too difficult. Pause and return to an easier step. A warning growl is communication, not bad behavior; punishing it can remove the warning without removing the fear.
Step 2: Choose a stable, comfortable position
Use a position that lets you see the nail without twisting the leg. Some dogs are comfortable standing on a non-slip mat while you lift one paw. Others prefer lying on their side. For back paws, looking at the nail from behind the dog can make the natural cutting angle easier to judge.
If a second person helps, their role is to offer treats and monitor body language—not to pin the dog down. Force may get one trim completed, but it often makes the next session harder and less safe.

Step 3: Make the first tiny cut
Hold the toe securely but gently. Follow the natural angle of the nail and remove only about 1–2 mm from the tip. Make a clean cut rather than slowly squeezing dull blades. Reward your dog immediately, even if you plan to inspect the nail before making another cut.
The goal of the first cut is information, not length. Look directly at the cross-section. If it remains dry and uniformly pale, another very small slice may be reasonable. Never rely only on where the nail begins to curve; anatomy varies from dog to dog and even from nail to nail.
Step 4: Read the cut surface after every slice
As you approach the quick, the center of a black nail usually changes in texture and definition. You may see a small dark circle or oval surrounded by lighter nail. The surface may also look less dusty and more like the smooth inside of a jellybean. Stop when this central area becomes distinct. Cutting farther risks reaching the sensitive tissue underneath.
Do not try to make every nail identical. One quick may extend farther than another. When you are uncertain, stop. A nail left slightly long is safer than a painful cut that makes future handling frightening.

Step 5: Remember dewclaws and rough edges
Dewclaws sit higher on the inside of the leg and do not wear against pavement. They are easy to miss and can eventually curl toward the skin. Check every leg, including for double dewclaws on breeds that may have them.
If a clipped edge feels sharp, smooth it with a nail file or a brief touch from a grinder. Keep long fur away from rotating tools. With a grinder, use one- or two-second touches and pause between them because friction can heat the nail.
Step 6: Reward and stop while the session is still successful
One calm nail is a successful training session. Give a treat after each easy repetition and finish before your dog runs out of patience. You can trim another nail later in the day or complete one paw every few days. Short, predictable sessions build trust much faster than an occasional struggle to finish everything.
What to do if you cut the quick
Stay calm and end the trimming session. Press styptic powder firmly onto the nail tip and hold gentle pressure. If you do not have styptic powder, cornstarch or flour may help with a small bleed while you contact your veterinary clinic for guidance. Prevent your dog from licking or running until the bleeding has stopped.
Seek veterinary help if bleeding is heavy, continues despite steady pressure, keeps restarting, or the nail is torn rather than simply clipped short. Dogs with a clotting disorder or medication that affects clotting need individual veterinary advice.
Clippers or grinder: which is safer?
Neither tool is automatically best. Clippers are quick and quiet, which suits dogs who dislike sound or vibration. A grinder removes material gradually and leaves a rounded edge, but it takes longer and can become warm. Some dogs prefer one tool for front paws and another for back paws. Introduce either tool at a distance, pair it with treats and progress only while your dog remains comfortable.
Common black-nail trimming mistakes
- Taking one large cut: Several thin slices give you more chances to see the warning signs.
- Using dull clippers: Crushing pressure can be uncomfortable even when the quick is not touched.
- Forcing the paw: Sudden movement makes an accidental cut more likely and can create long-term fear.
- Chasing a perfect length: Stop based on the nail’s cross-section, not on appearance alone.
- Skipping dewclaws: They receive little natural wear and may overgrow fastest.
- Grinding continuously: Short touches prevent heat buildup.
How often should black dog nails be trimmed?
There is no universal calendar. VCA notes that many dogs need a trim roughly every three to four weeks, while others need it more frequently. Activity, walking surface, age and individual growth rate all matter. Listen for clicking on hard floors and look at how the paw rests. Nails that touch the floor while the dog is standing naturally may be due for attention.
For overgrown nails, small weekly trims may be more useful than waiting a month. Keep a simple note on your phone with the date and how many nails you completed. That makes it easier to find a rhythm before the nails become difficult again.
When to ask a professional for help
- Your dog trembles, panics, growls, snaps or cannot stay still safely
- A nail is split, torn, infected or growing into the paw pad
- The nails are severely overgrown or affect the way your dog walks
- You cannot identify a safe stopping point after several tiny cuts
- Your dog has a health condition or medication that changes bleeding risk
A professional trim is not a failure. A veterinarian or skilled groomer can shorten urgent nails safely and demonstrate the angle and stopping signs on your own dog. If fear is severe, your veterinarian can also discuss a low-stress handling plan.
Frequently asked questions
Can a flashlight reveal the quick in a black nail?
Sometimes a strong light from the side helps on thinner dark nails, but it is not reliable for every dog. Continue to use tiny cuts and inspect the cross-section rather than trusting the light alone.
Can walking on pavement replace nail trims?
Hard surfaces may slow growth or smooth the tips, but wear is often uneven and does not reach dewclaws. Check the nails regularly even if your dog walks on pavement every day.
How many nails should I trim in one session?
As many as your dog can comfortably handle. For a worried dog, that may be one nail. Ending on a calm repetition is more valuable than completing a full paw through restraint.
Health note: This guide provides general educational information and is not a substitute for veterinary advice. Contact your veterinarian for nail injury, ongoing bleeding, significant pain, lameness or concerns about your dog’s individual health.
Explore more practical guidance in our Dog Care library or browse all how-to videos.
Sources reviewed
- VCA Animal Hospitals: How to Trim a Dog’s Nails
- VCA Animal Hospitals: Successful Nail Trims—Training for Happy Handling
- VCA Animal Hospitals: Taking the Stress Out of Nail Trimming for Dogs
Free printable: At-Home Dog Grooming Checklist
Keep track of your dog’s coat care between grooms. Print it for a simple reminder.
Download the free checklist (PDF) →